Create an SMS app with a simple UI using Node-RED on a Raspberry Pi.
Node-RED is an easy-to-use programming tool to develop apps with minimal or no coding. It’s browser-based interface provides a rich set of pre-built modules, called nodes, that can be used in a drag-and-drop interface to quickly develop an application.
In this tutorial, we’ll look at how to develop an SMS app using Node-RED on the Raspberry Pi platform. For this SMS app, we’ll create a simple UI for the user to input phone numbers and messages using Node-RED’s form node. We’ll use function nodes to do post-processing of user input. Node-RED has built-in nodes for serial communication, and we’ll use them to write serial data to the modem port.
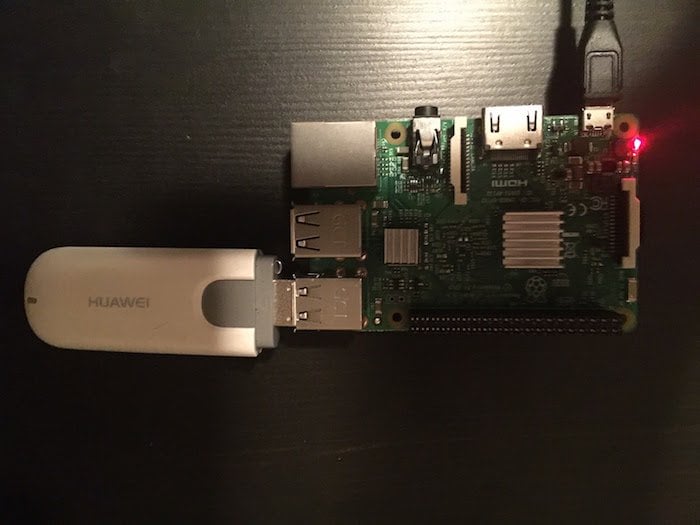
Setup for this tutorial consists of RaspberryPi 3 with a Huawei 3G USB Modem, which is connected to a cellular network.
The first step is to find the port that the USB modem is connected to. Note that USB modem devices create one or more virtual COM ports. To find the ports, you can use the command below:
In this case, the Huawei modem created three virtual COM ports on the Raspberry Pi: ttyUSB0, ttyUSB1, and ttyUSB2. One of those ports is the modem port, which can be used to send AT commands.
Now let's create an SMS App using Node-RED, which comes pre-installed on Raspbian Jessie for the Raspberry Pi. To start Node-RED, simply type ‘node-red’ in the command line.
The Node-RED flow used in this tutorial can be downloaded from Github: https://github.com/m2msupport/node-red-sms-app
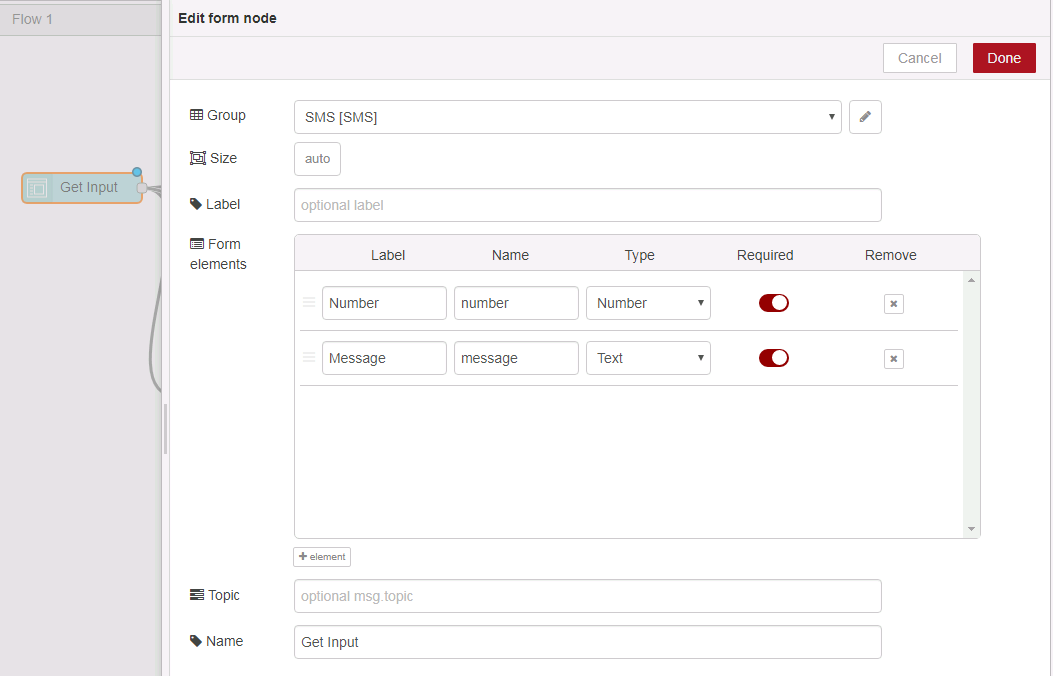
We’ll create a simple form for the user to enter their phone number and SMS messages. Forms created in Node-RED are accessible from http://<hostname>:1880/ui/ link.
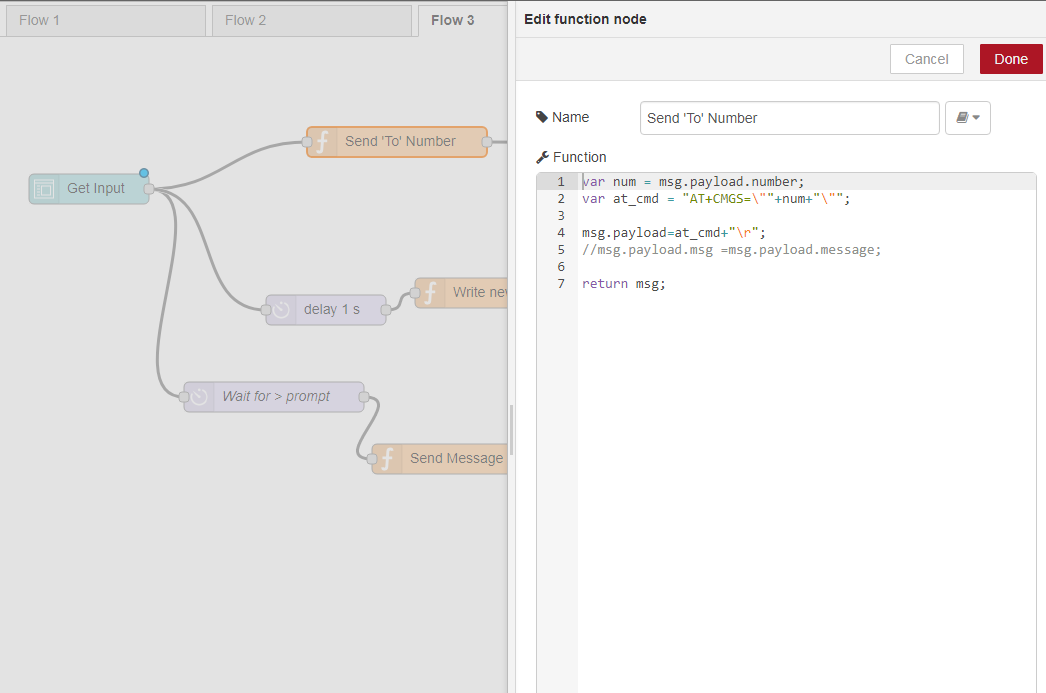
Now let's look at node flows. "Get Input" is the form node that generates the user interface shown above. The phone number and message are passed to function nodes to build the SMS AT command to write to the serial port. Node-RED has built in "Serial-In" and "Serial-Out" nodes to read/write to serial ports. We will use "Serial-Out" to write AT commands to the modem port and "Serial-In" to read and display the modem's response to the serial port.
"Get Input" is a form node that is configured with just two form elements: the phone number and message. The group determines if the form is grouped with any existing dashboard objects.
"Send To Number" is a function node where you can implement an application using Javascript. This function node takes the number provided by the form node and sets up the AT+CMGS command with the phone number. Note that with some modems, you may have to configure the modem to send an SMS in text mode using the AT+CMGF command.
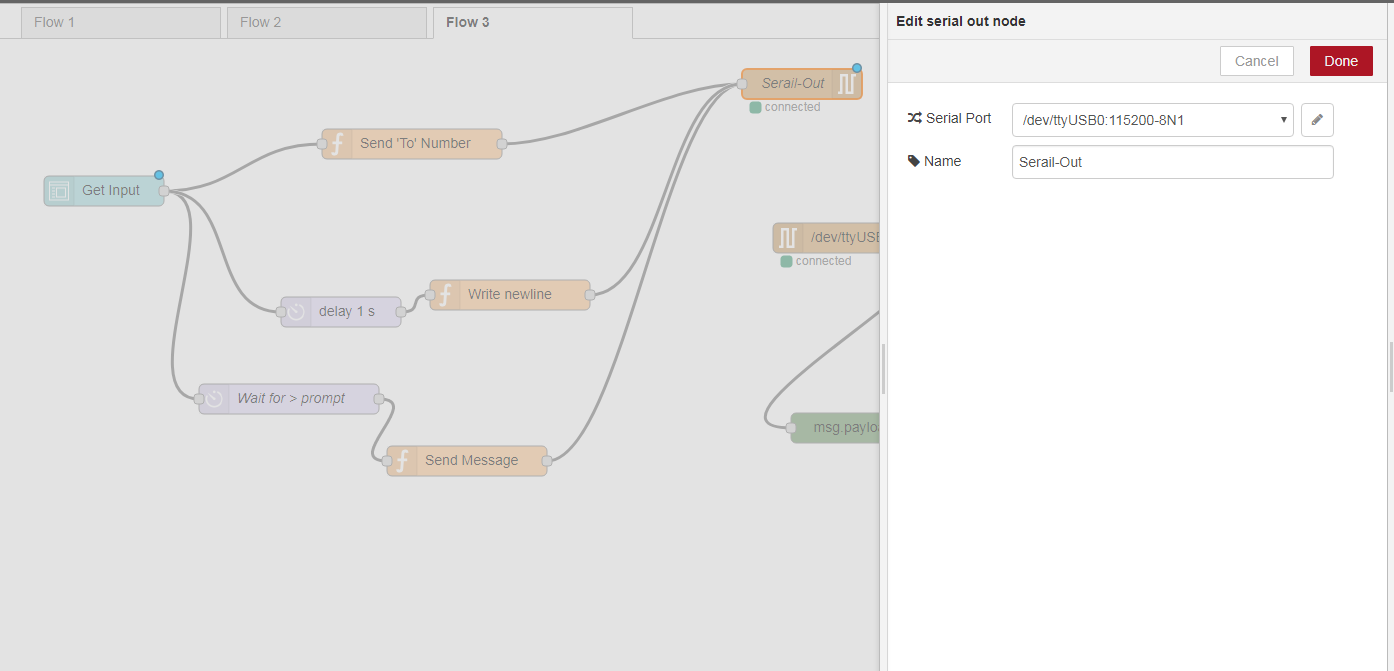
AT commands are written to the modem port using the "Serial-Out" node, which is configured to connect to ttyUSB0 at 115 kbps. It is important that this configuration matches the port number and modem port's port speed.
When the phone number and message are sent from the UI form, you can see the AT command sent and the response from the modem in the debug window.
You should be able to send an SMS to your Raspberry Pi now! Node-RED can be used as a quick prototyping tool to develop your application with minimal or no coding. If you've developed any applications with Node-RED, let us know in the comments!